Child CPR, AED and Choking
Playlist includes 8 training videos
Children have breathing difficulties more often than they have actual heart problems. Therefore, it is important to begin CPR quickly and perform five sets of CPR for one rescuer or ten sets of CPR for two rescuers before going to get additional help. One set of CPR for one rescuer consists of 30 compressions and two breaths, and one set of CPR for two rescuers consists of 15 compressions and two breaths.
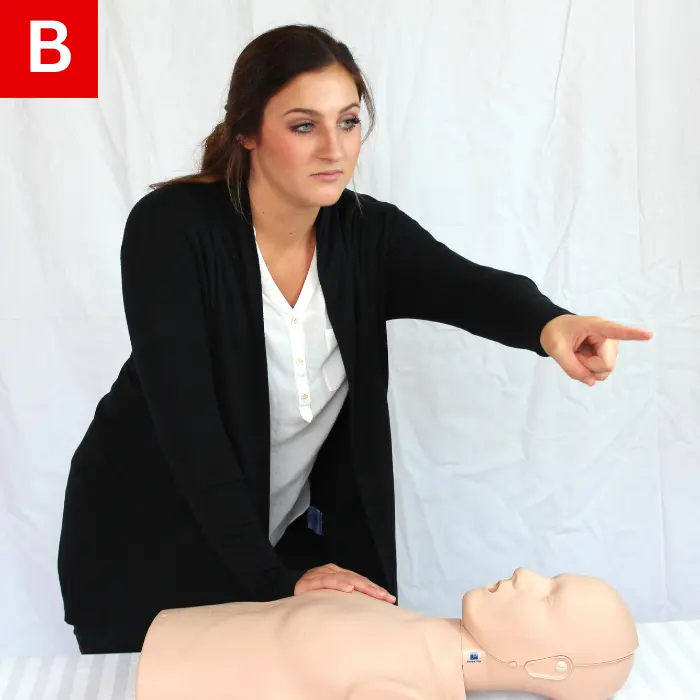
If someone else is available, send them to call 911/EMS and to find an AED. When they return, have them follow the AED prompts, apply AED pads, and help with CPR.
If the child is unresponsive and not breathing or only gasping for air, provide CPR.
When giving CPR to a child, do the following:
- Make sure the scene and area around the child are safe.
- Tap the child and talk loudly: “Are you okay?”
- Yell for help.
- Check breathing.
- If not responding and not breathing or only gasping, then give 2 minutes of CPR or five sets of 30 compressions (ten sets of 15 compressions for two rescuer).
- Call 911/EMS and get an AED.
- Resume CPR and give compressions and breaths.
CHILD CPR (1 YEAR TO PUBERTY)
CPR in children is very similar to CPR in adults. The main goals are early administration of CPR, pushing hard and fast on the chest, and giving breaths. Individuals older than one year of age that have not yet reached puberty are considered children. Some children appear adult-size and can be treated as adults for the purposes of CPR.
The term “unresponsive” or “not responding” includes any child who does not move, blink, speak, make a sound, or otherwise react to your efforts to awaken them.
As a rescuer, if you are untrained in CPR, then give the “hands-only” CPR. The “hands-only” CPR is when you give continuous compressions but no breaths.
If you can see a foreign object in the child’s mouth and can easily remove it, do so. Avoid blindly sweeping the mouth with a finger as it may push the object deeper into the airway. Watch and feel for breathing to begin. If the child does not respond or begin breathing, begin CPR and continue to provide it until additional help arrives.
Large children may require chest thrusts if you cannot wrap your arms fully around the waist. In this case, perform the Heimlich maneuver with your fist on the breastbone.
Any child who has had a severe choking event should see a doctor.
If the child stops responding, lay them down and yell for help. Check for breathing and begin CPR. After 30 compressions, open the airway and look for a foreign object. If visible, remove it and attempt to give a breath. Continue CPR until the child recovers or more advanced help arrives.
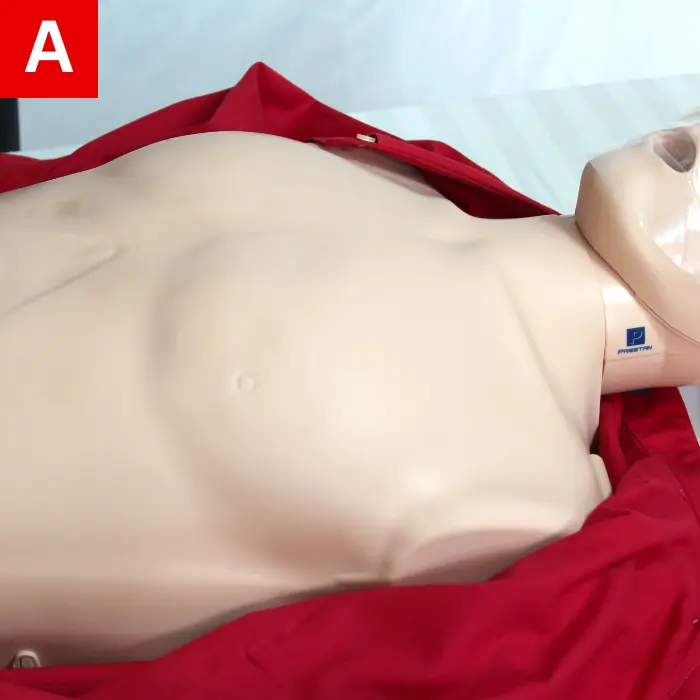
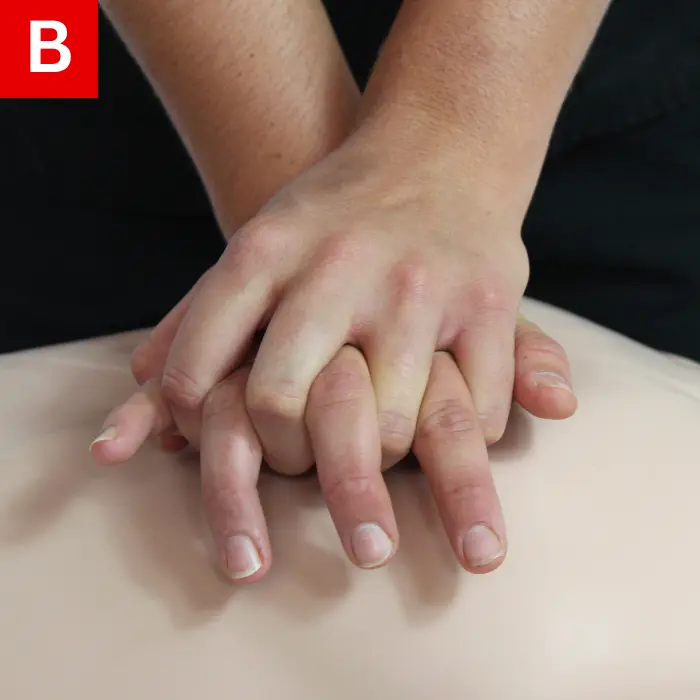
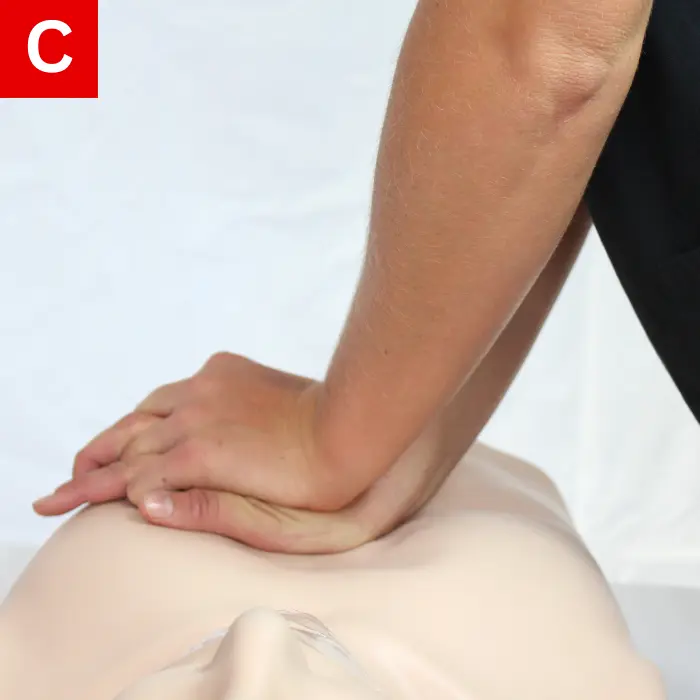
COMPRESSIONS
Rescuers may be afraid to perform chest compressions out of fear of hurting the child. It is important to remember that without CPR, the result will be death.
To do CPR on a child, do the following:
- Position the child on their back on a firm, hard surface.
- Move any thick clothing away from the chest (Figure 19a).
- Place the heel of one hand on the lower half of the breastbone (Figure 19b).
- Push straight down approximately at least one third the depth of the chest. In most children, this will be about two inches (5 cm). Compressions should be delivered at a rate of 100 to 120 beats per minute (Figure 19c).
- Let the chest recoil to its normal position after every compression.
Performing CPR can be tiring. If someone is available to help, change roles every two minutes and work to minimize the pause in between compressions.
GIVING BREATHS
Unresponsiveness in children is often caused by breathing problems, not heart problems. Prevention of choking or severe breathing problems due to untreated illness is the most effective treatment. Giving breaths during CPR can help the child. Severe breathing problems from a respiratory illness can cause cardiac arrest in children. Most children who need CPR have had a breathing problem that caused the heart to beat irregularly or to stop
beating altogether.
Signs of ineffective breathing include slow breathing, very shallow or sporadic breathing, and absence of any breaths altogether. Give rescue breaths to children who appear to be struggling to breathe. A good breath will cause the child’s chest to rise.
To open the person’s airway, do the following:
- Put one hand on their forehead (Figure 20a).
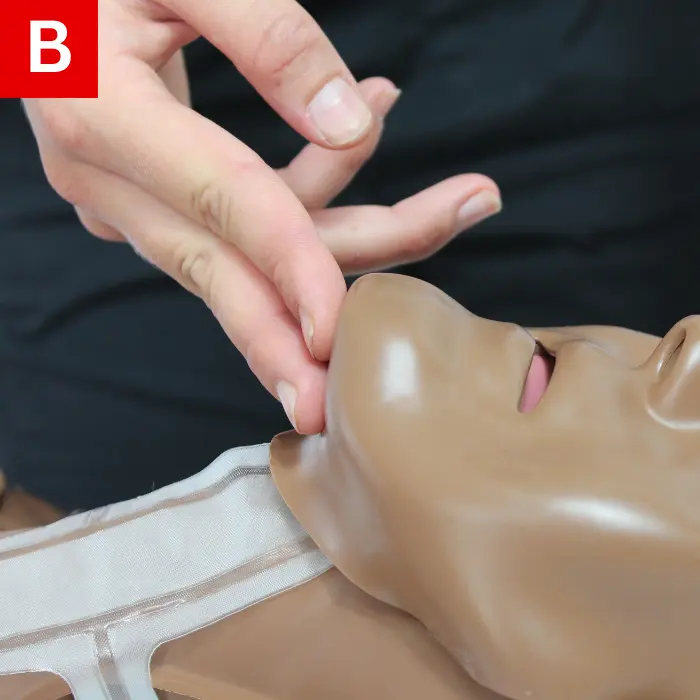
- Place your fingers on the bony part of their chin (Figure 20b).
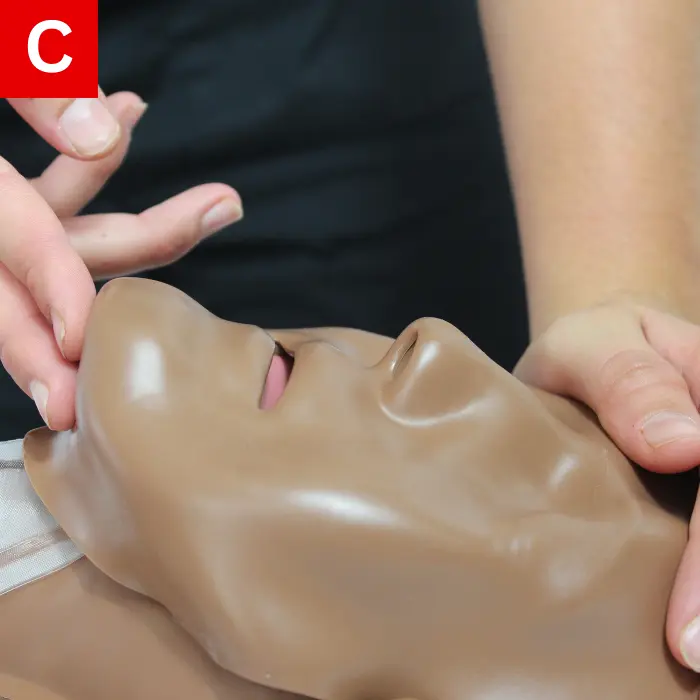
- Gently tilt the head back while lifting the chin (Figure 20c).
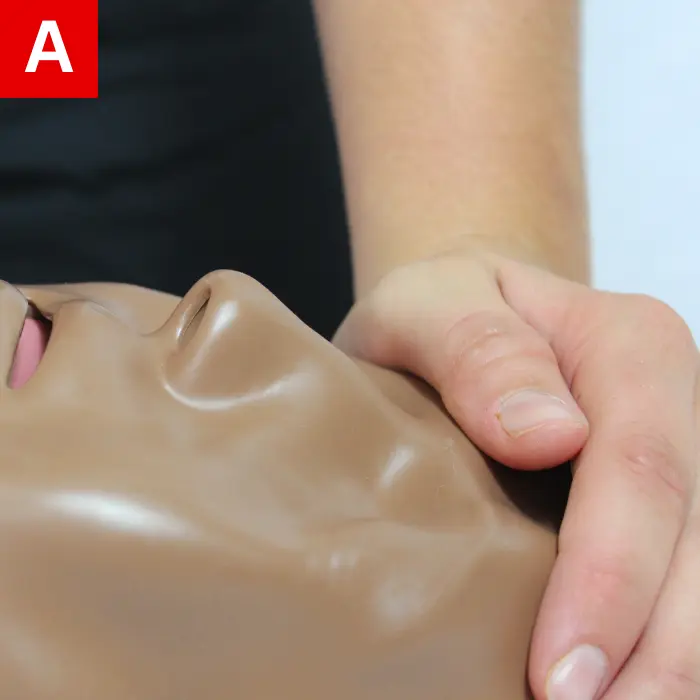
Now you are ready to give breaths.
Do the following:
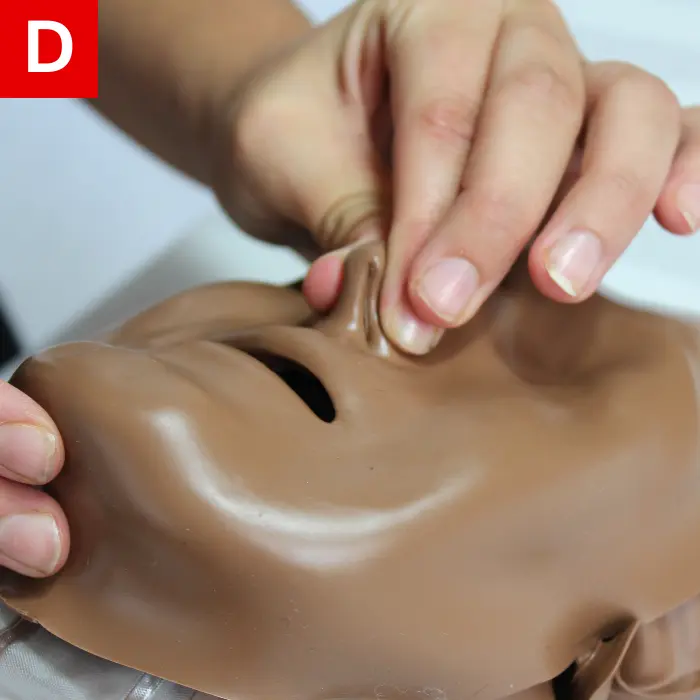
- Hold the child’s airway open as described above and pinch their nose shut (Figure 20d).
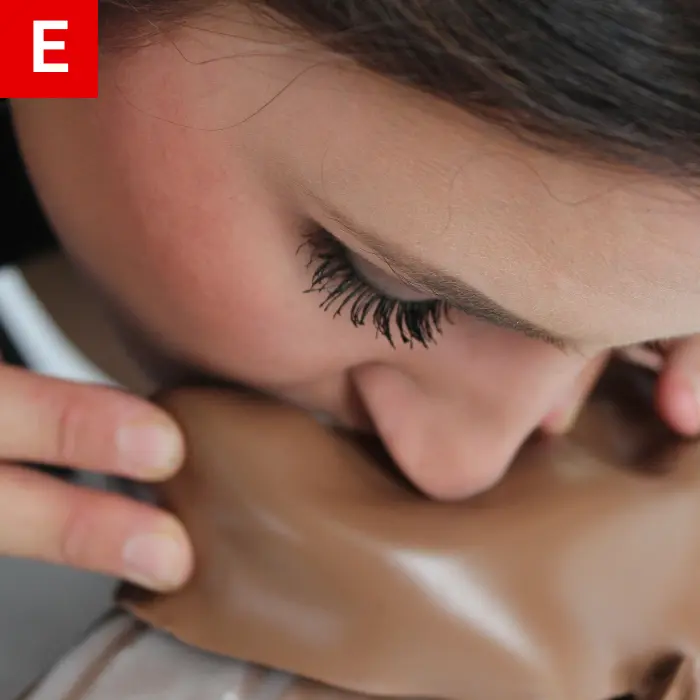
- Take a deep breath and seal your mouth around the child’s mouth (Figure 20e).
- Blow into their mouth for one second and watch their chest rise.
- Repeat with a second breath.
If the chest does not rise, reposition the airway. Let their head go back to a normal position and repeat the head-tilt/chin-lift maneuver. Then give another breath and look for the chest to rise.
Perform the chest compressions without interruption. It should take no longer than 10 seconds to give two breaths. If the child’s chest fails to rise within 10 seconds, begin chest compressions again.
MASK USE
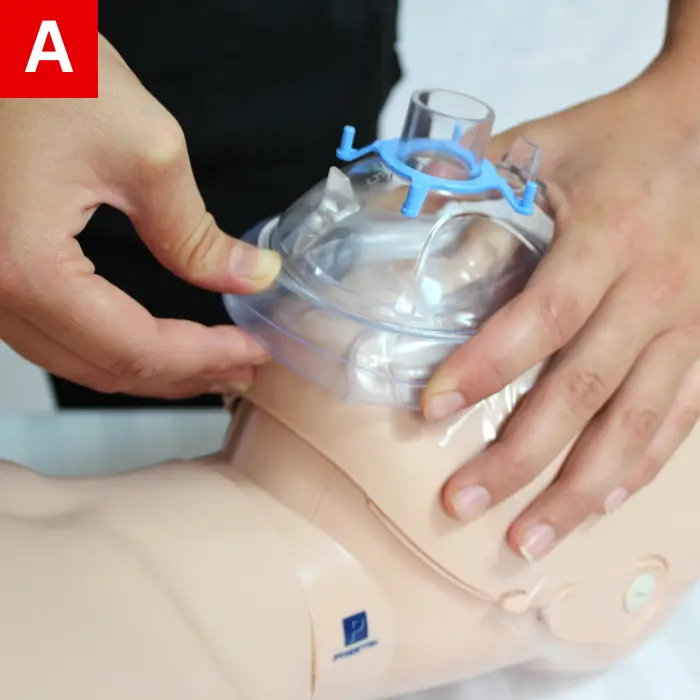
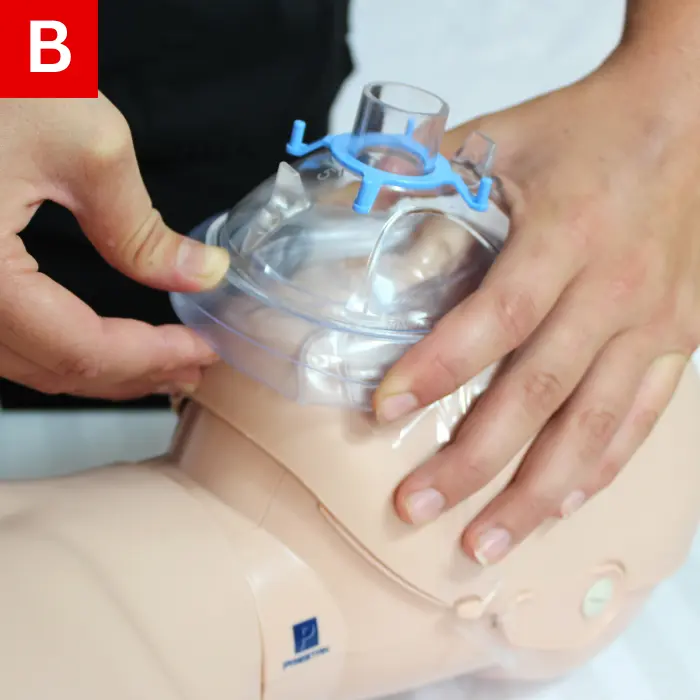
Giving breaths in CPR is generally safe. However, if a mask is available, it should be used. The mask fits over the child’s mouth and nose. Many masks have a pointed end, which should go over the bridge of the nose.
Make sure the mask fits properly; if it is too large, a proper seal cannot be obtained and efforts to deliver breaths will be ineffective.
When using a mask to give breaths,
do the following:
- Place the mask over the child’s mouth and nose (Figure 21a).
- Open their airway by performing the head-tilt/chin-lift maneuver (Figure 21b).
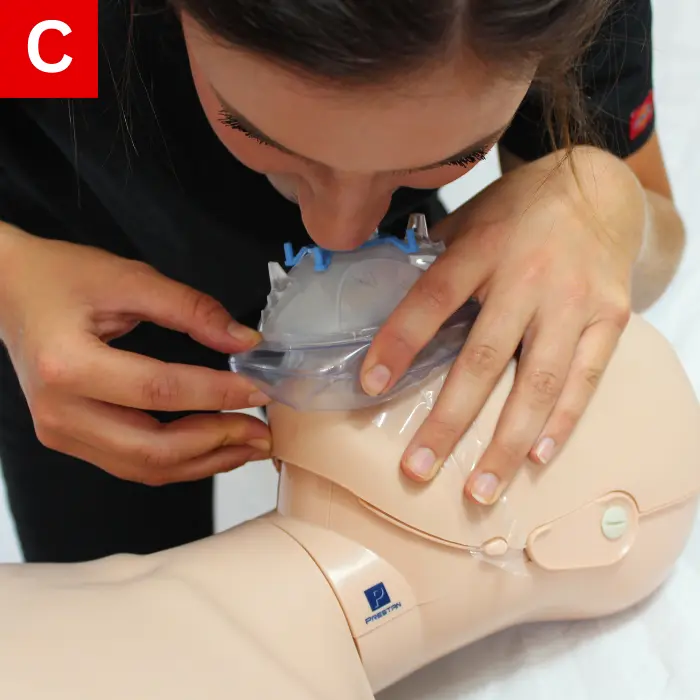
- Ensure a good seal between the mask and the face.
- Give a breath for over one second and watch the chest rise. (Figure 21c)
- Deliver the second breath.
AED FOR CHILDREN
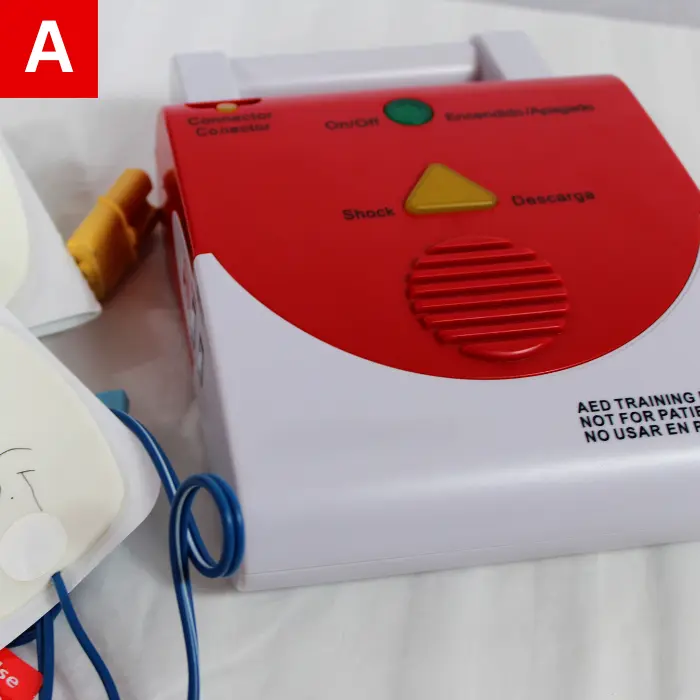
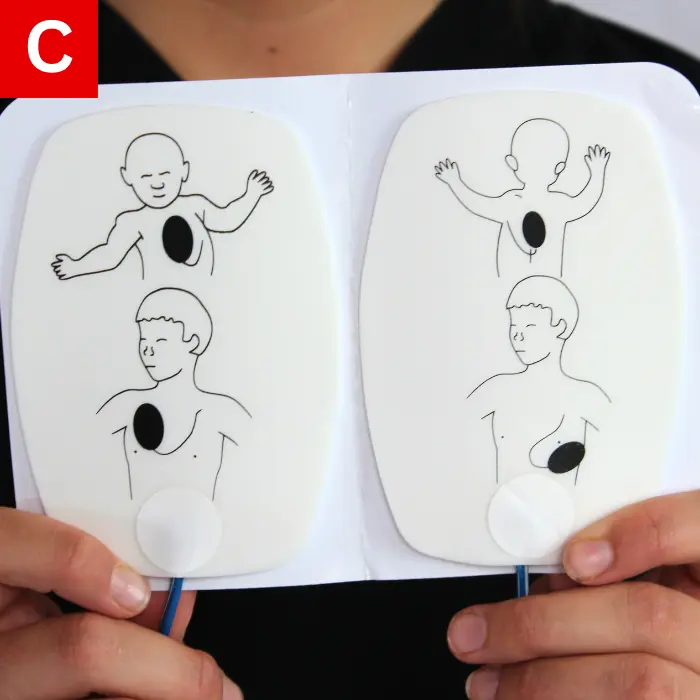
An AED can be used on children and should be used as early as possible but should not interfere with CPR. The steps for using an AED on a child are the same as those in an adult. Check the AED when it arrives on the scene. If the child is younger than eight years, pediatric pads should be used (Figure 22c). Standard (adult) pads may be used if pediatric pads are not available. If using standard pads, do not let the pads overlap each other. You may need to put one of the pads on the child’s back if the child is small.
Some AEDs have a switch that can be set to deliver a pediatric shock. If available, turn this switch on when using for children younger than eight years or less than 55 pounds (25 kg). If the AED cannot deliver a pediatric shock, an adult shock should be given. Be sure to start CPR.
To use an AED on a child, do the following:
- Turn the power on (Figure 22a).
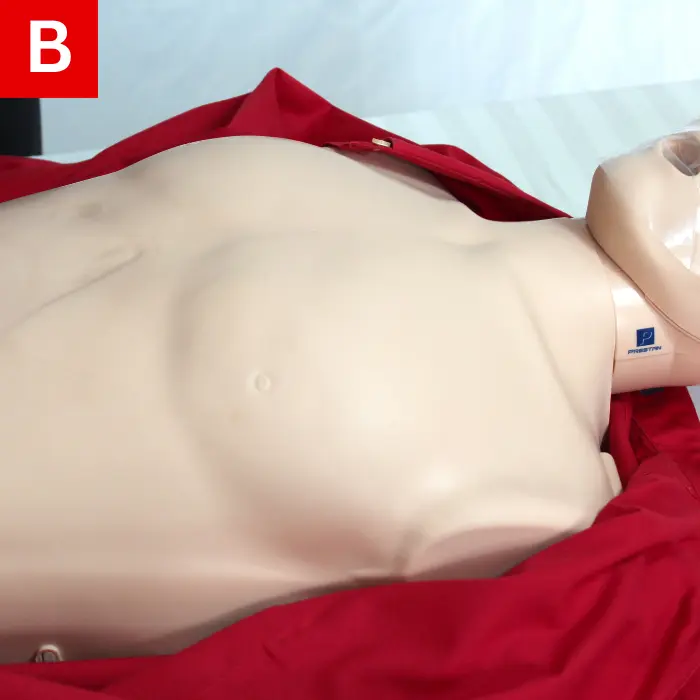
- Expose the chest (Figure 22b).
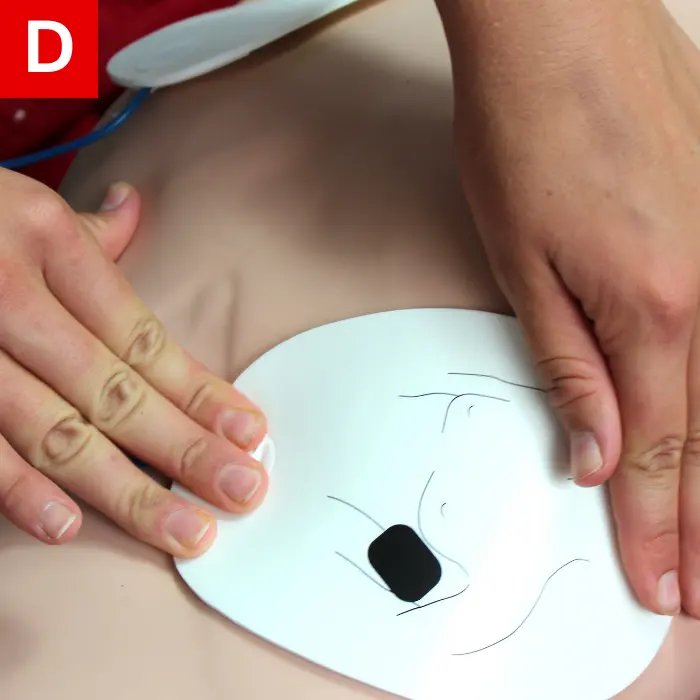
- Apply pads on the child. Ensure that the pads do not touch (Figure 22c, Figure 22d).
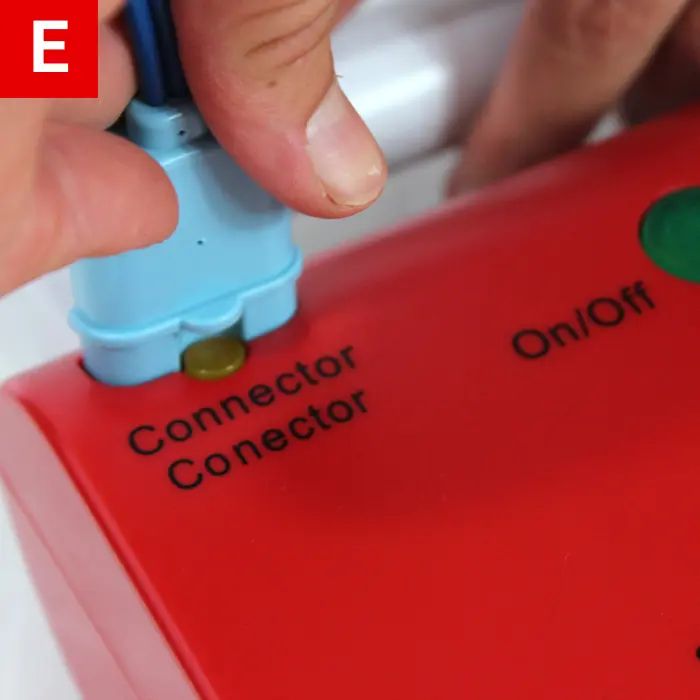
- Connect the pads (Figure 22e).
- Clear the child so no one is touching the child.
- Analyze the rhythm.
- Follow the prompts: Shock Advised, No Shock Advised, Check Connection, etc.
- Resume CPR with compressions (Figure 22f).
ACTIVATING EMS (CALLING 911)
Always make sure that the scene is safe when approaching a child. If you become injured or disabled, it will only make the situation worse.
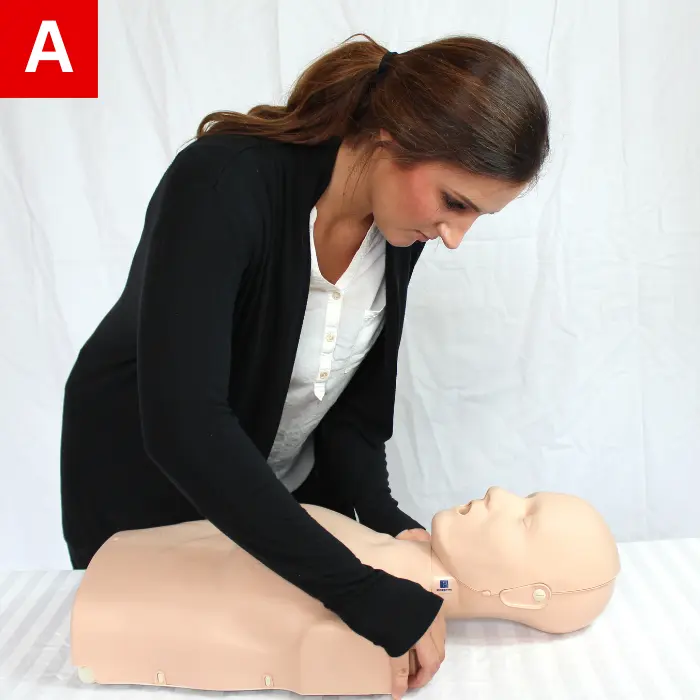
Tap the child and talk loudly: “Are you okay?” (Figure 23a) If they fail to make any response, they are considered unresponsive. Yell for help and send somebody to call 911/EMS and to get an AED if possible (Figure 23b).
After determining that the child is unresponsive, check their breathing. If they are barely breathing or only gasping, begin CPR. Gasping may be forceful or weak, but it is generally ineffective. This is abnormal and often occurs in cardiac arrest.
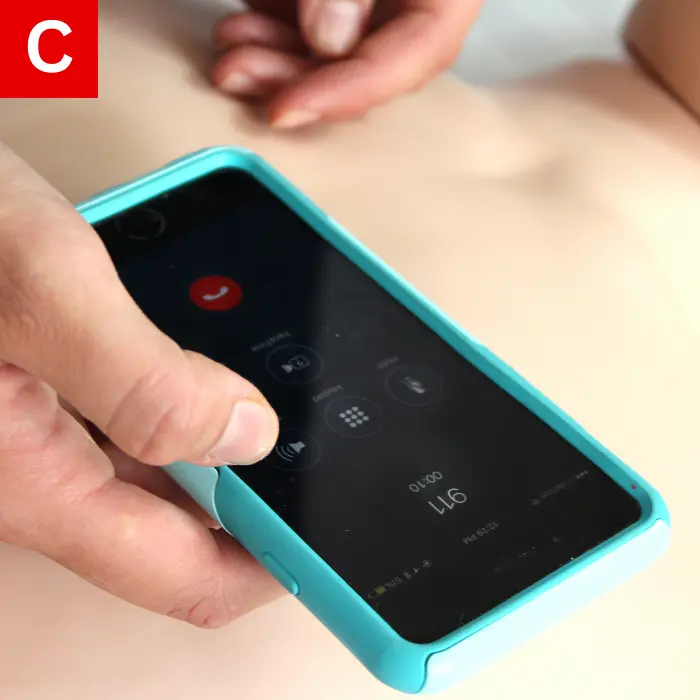
If you are alone and must leave the child to activate EMS, give five sets of 30 compressions and 2 breaths (about two minutes) before leaving the child. (The ILCOR points out that most rescuers are likely to have speakerphone equipped cell phones, so the rescuer can call 911/EMS without leaving the child) (Figure 23c).
CHOKING IN CHILDREN
Choking can be mild or severe. If the child can make sounds and cough, the airway is mildly blocked. Stand near them and encourage them to cough. Call 911/EMS immediately if you are worried about their breathing.
Severe signs of blockage include the inability to breathe, coughing without making a sound, inability to speak, or the universal choking sign. In any of these cases, immediate action is required.
Table 2 will help determine whether the choking is mild or severe.
| DEGREE OF OBSTRUCTION | RESPONSIVENESS | RESCUERS ACTIONS |
|---|---|---|
| Mild Obstruction |
|
|
| Severe Obstruction |
|
|
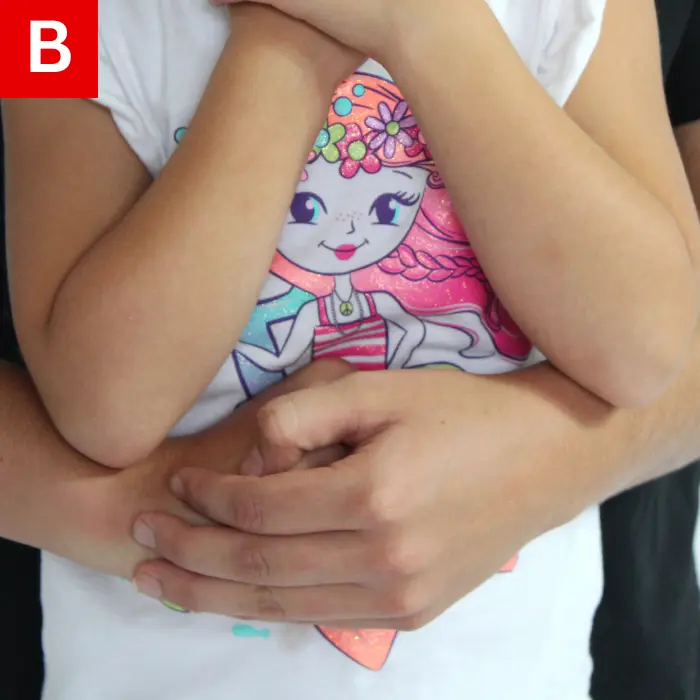
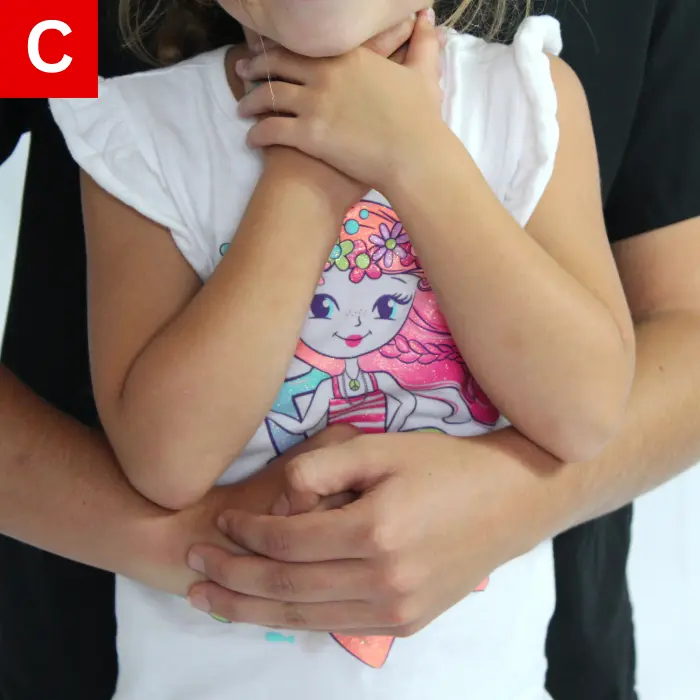
Abdominal Thrusts
RELIEF OF CHOKING
Use abdominal thrusts learned in the adult section for children who are choking.
To relieve choking in a child, do the following:
- Ask if they are choking.
- Tell them you will help.
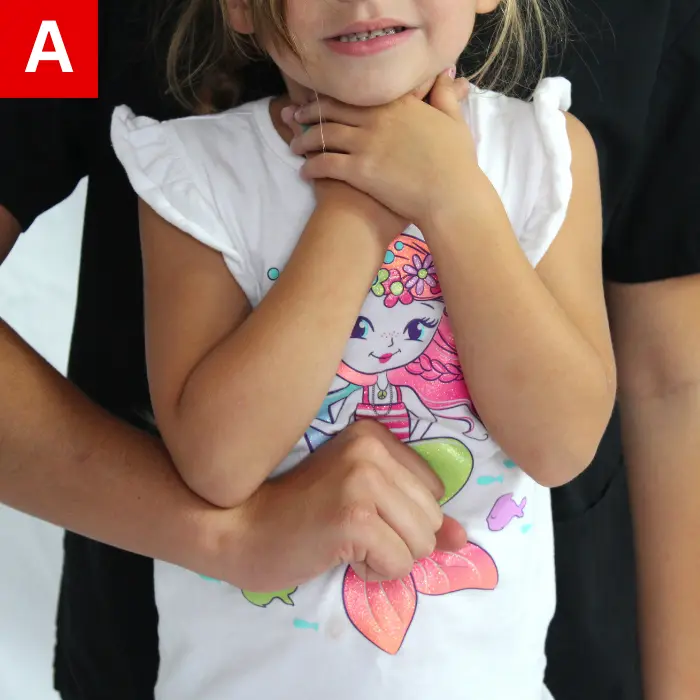
- Stand behind them and wrap your arms around their body below the rib cage (Figure 24a).
- Make a fist with one hand and place it just above the navel (Figure 24b).
- Grab the fist with your other hand and deliver quick upward thrusts (Figure 24c).
- Continue until the obstruction comes out and breathing is possible, coughing or speaking is restored, or until the child stops responding.
If you can see a foreign object in the child’s mouth and can easily remove it, do so. Avoid blindly sweeping the mouth with a finger as it may push the object deeper into the airway. Watch and feel for breathing to begin. If the child does not respond or begin breathing, begin CPR, and continue to provide it until additional help arrives.
Large children may require chest thrusts if you cannot wrap your arms fully around the waist. In this case, perform abdominal thrusts with your fist on the breastbone.
Any child who has had a severe choking event should see a doctor.
If the child stops responding, lay them down, and yell for help. Check for breathing and begin CPR. After 30 compressions for one provider or 15 compressions for two, open the airway and look for a foreign object. If visible, remove it and attempt to give a breath. Continue CPR until the child recovers or more advanced help arrives.


